

15.6kWh Ranger EV Battery Installation
It takes several hours to install an Atlas ESS battery into a Ranger EV. These photos show the process in great detail. It is not difficult.
Start by disconnecting the Main Power Connector MPC.
Reconnect the MPC when you are finished the installation.
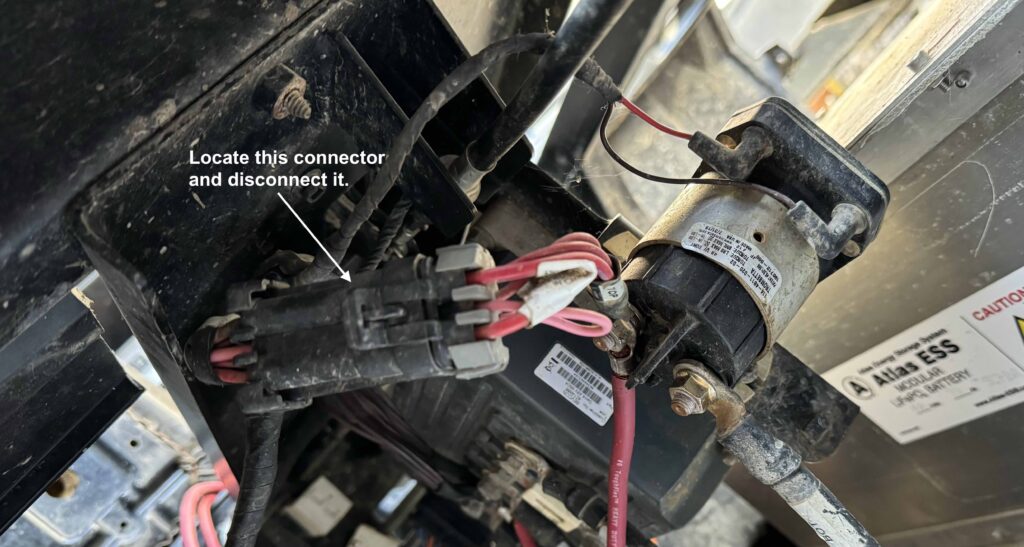
Remove Lead-Acid Batteries
Remove the body panels and inner fender panel on each side of the Ranger to gain access
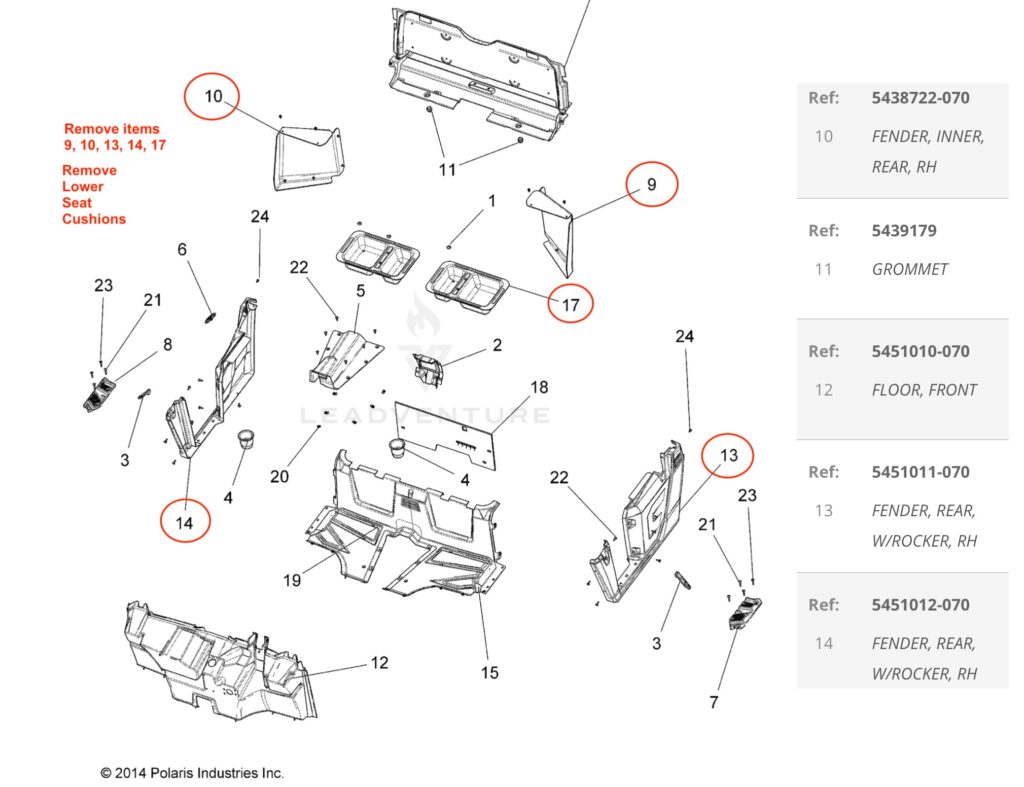
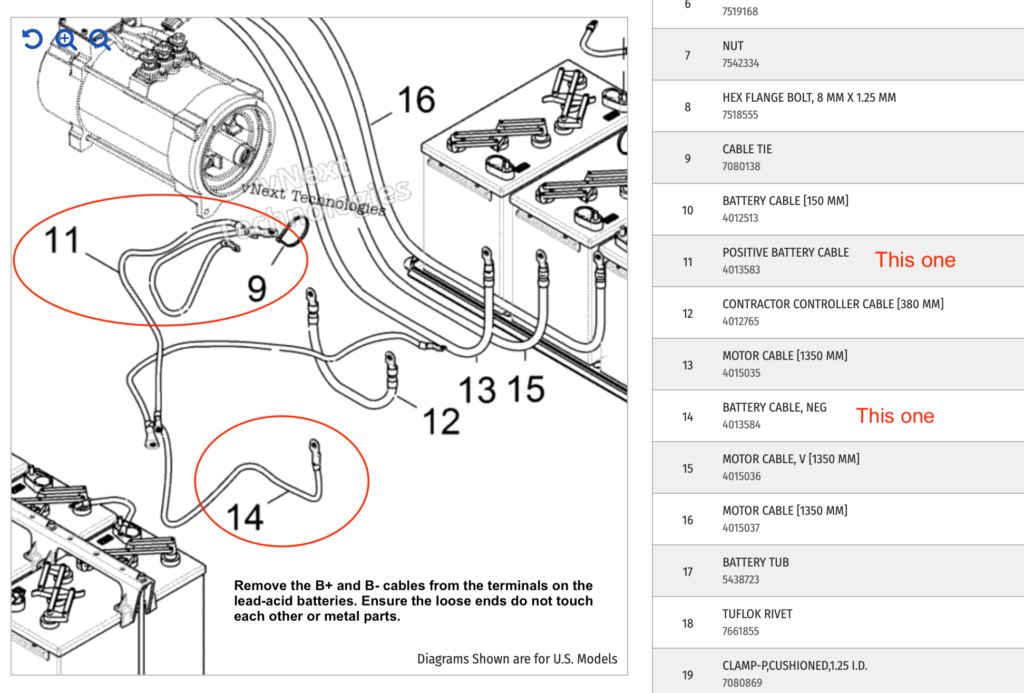
Remove the lead-acid batteries, battery hold-down hardware, power wires and plastic battery tray covers. These parts are not re-used. Do not remove the power wires connecting the motor controller to the contactor or motor.
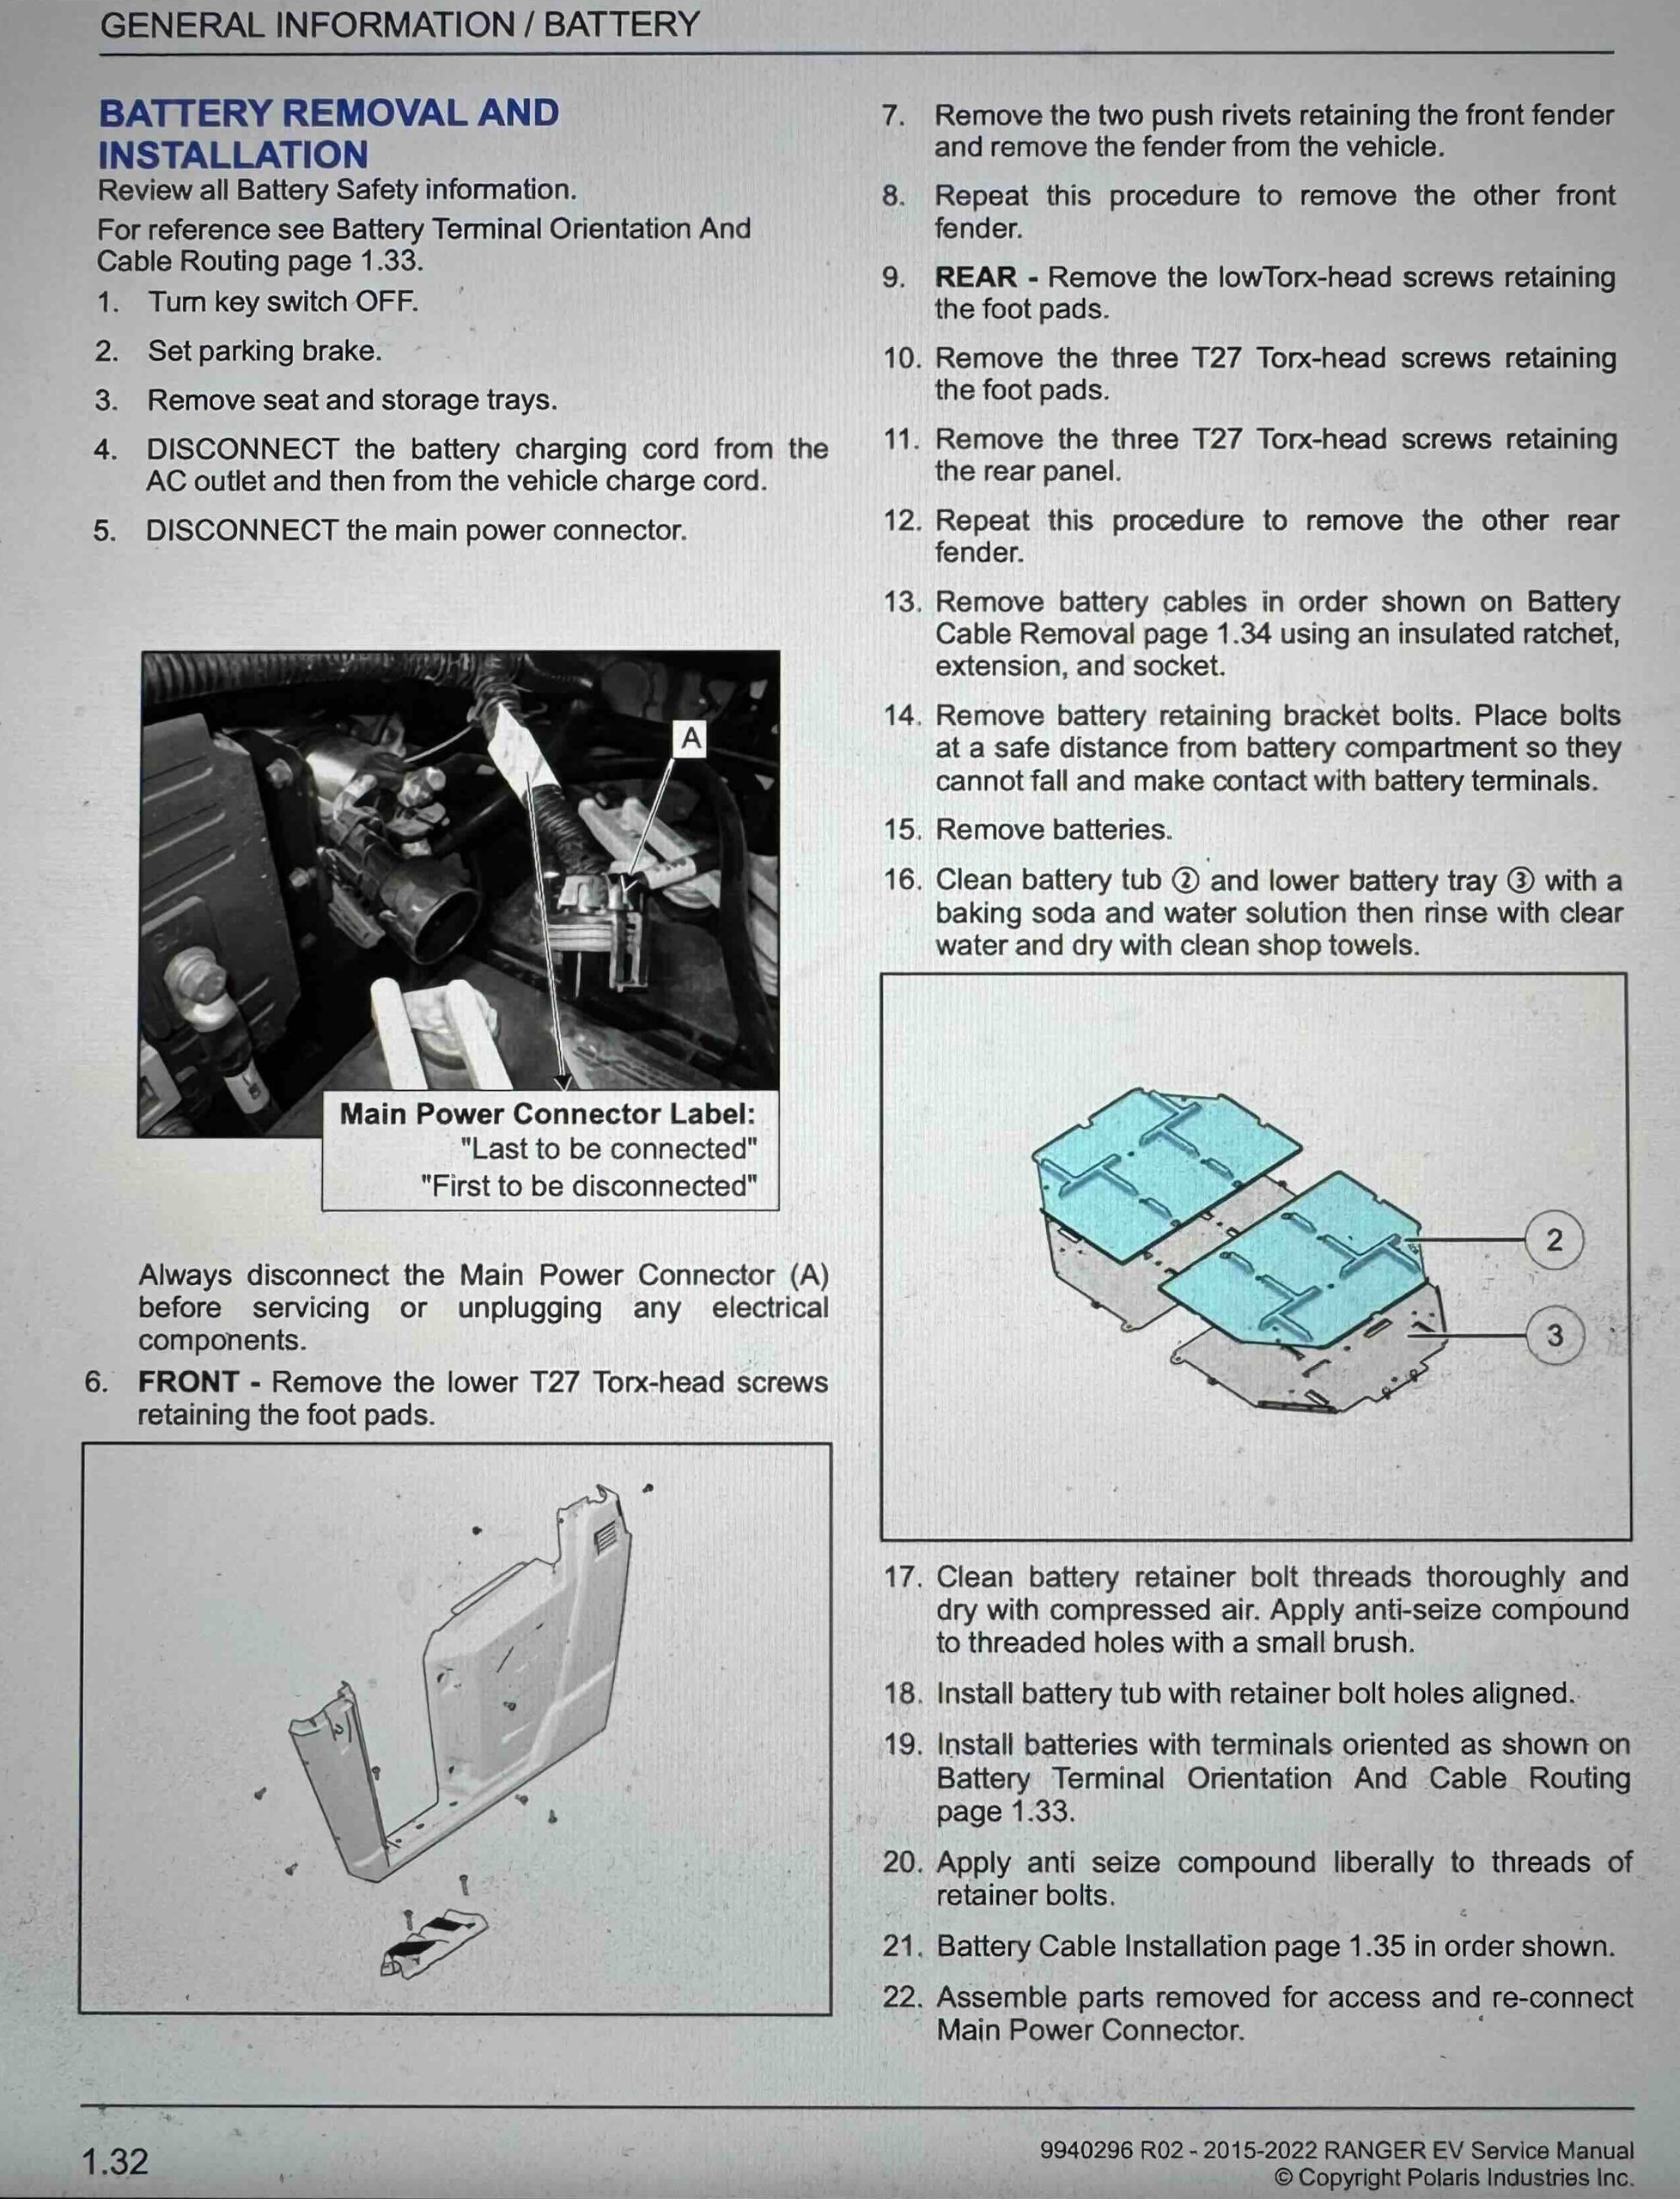
Below are the Polaris instructions for removing the lead-acid batteries
Often the frame rails on the Ranger are rusted from battery acid. Clean off the rust with a wire brush and paint with semi-gloss black rust paint before installing the Floorboards.
Install Floorboards
Here is a link to the Floorboards installation instructions.
https://atlas-ess.com/floorboard-installation/
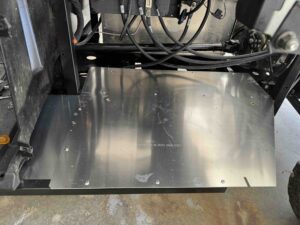
Install Passenger Side Battery First
Install the passenger side battery first with the positive terminal at the rear of the Ranger.
The battery bolts onto the floorboards with 4 x 5/16x1" bolts.
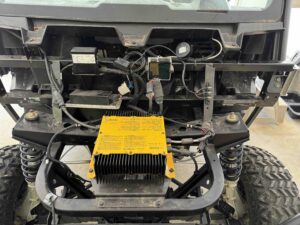
Place the Power Distribution Module PDM on top of the passenger side battery at the rear of the Ranger.
The connectors on the long side of the PDM face the drive shaft.
Make sure the PDM does not hit the plastic storage tray under the seat.
The PDM is held in place with velcro under the PDM.
It is easier to run and connect cables before you install the driver side battery because the driver side battery will restrict access to this area.
Connect the B- Power Cable from the PDM to the B- terminal on the sevcon motor controller.
Connect the lug on the B+ Power Cable to the top post on the factory contactor. The orange push-on connector on this cable will connect to the driver side battery later.
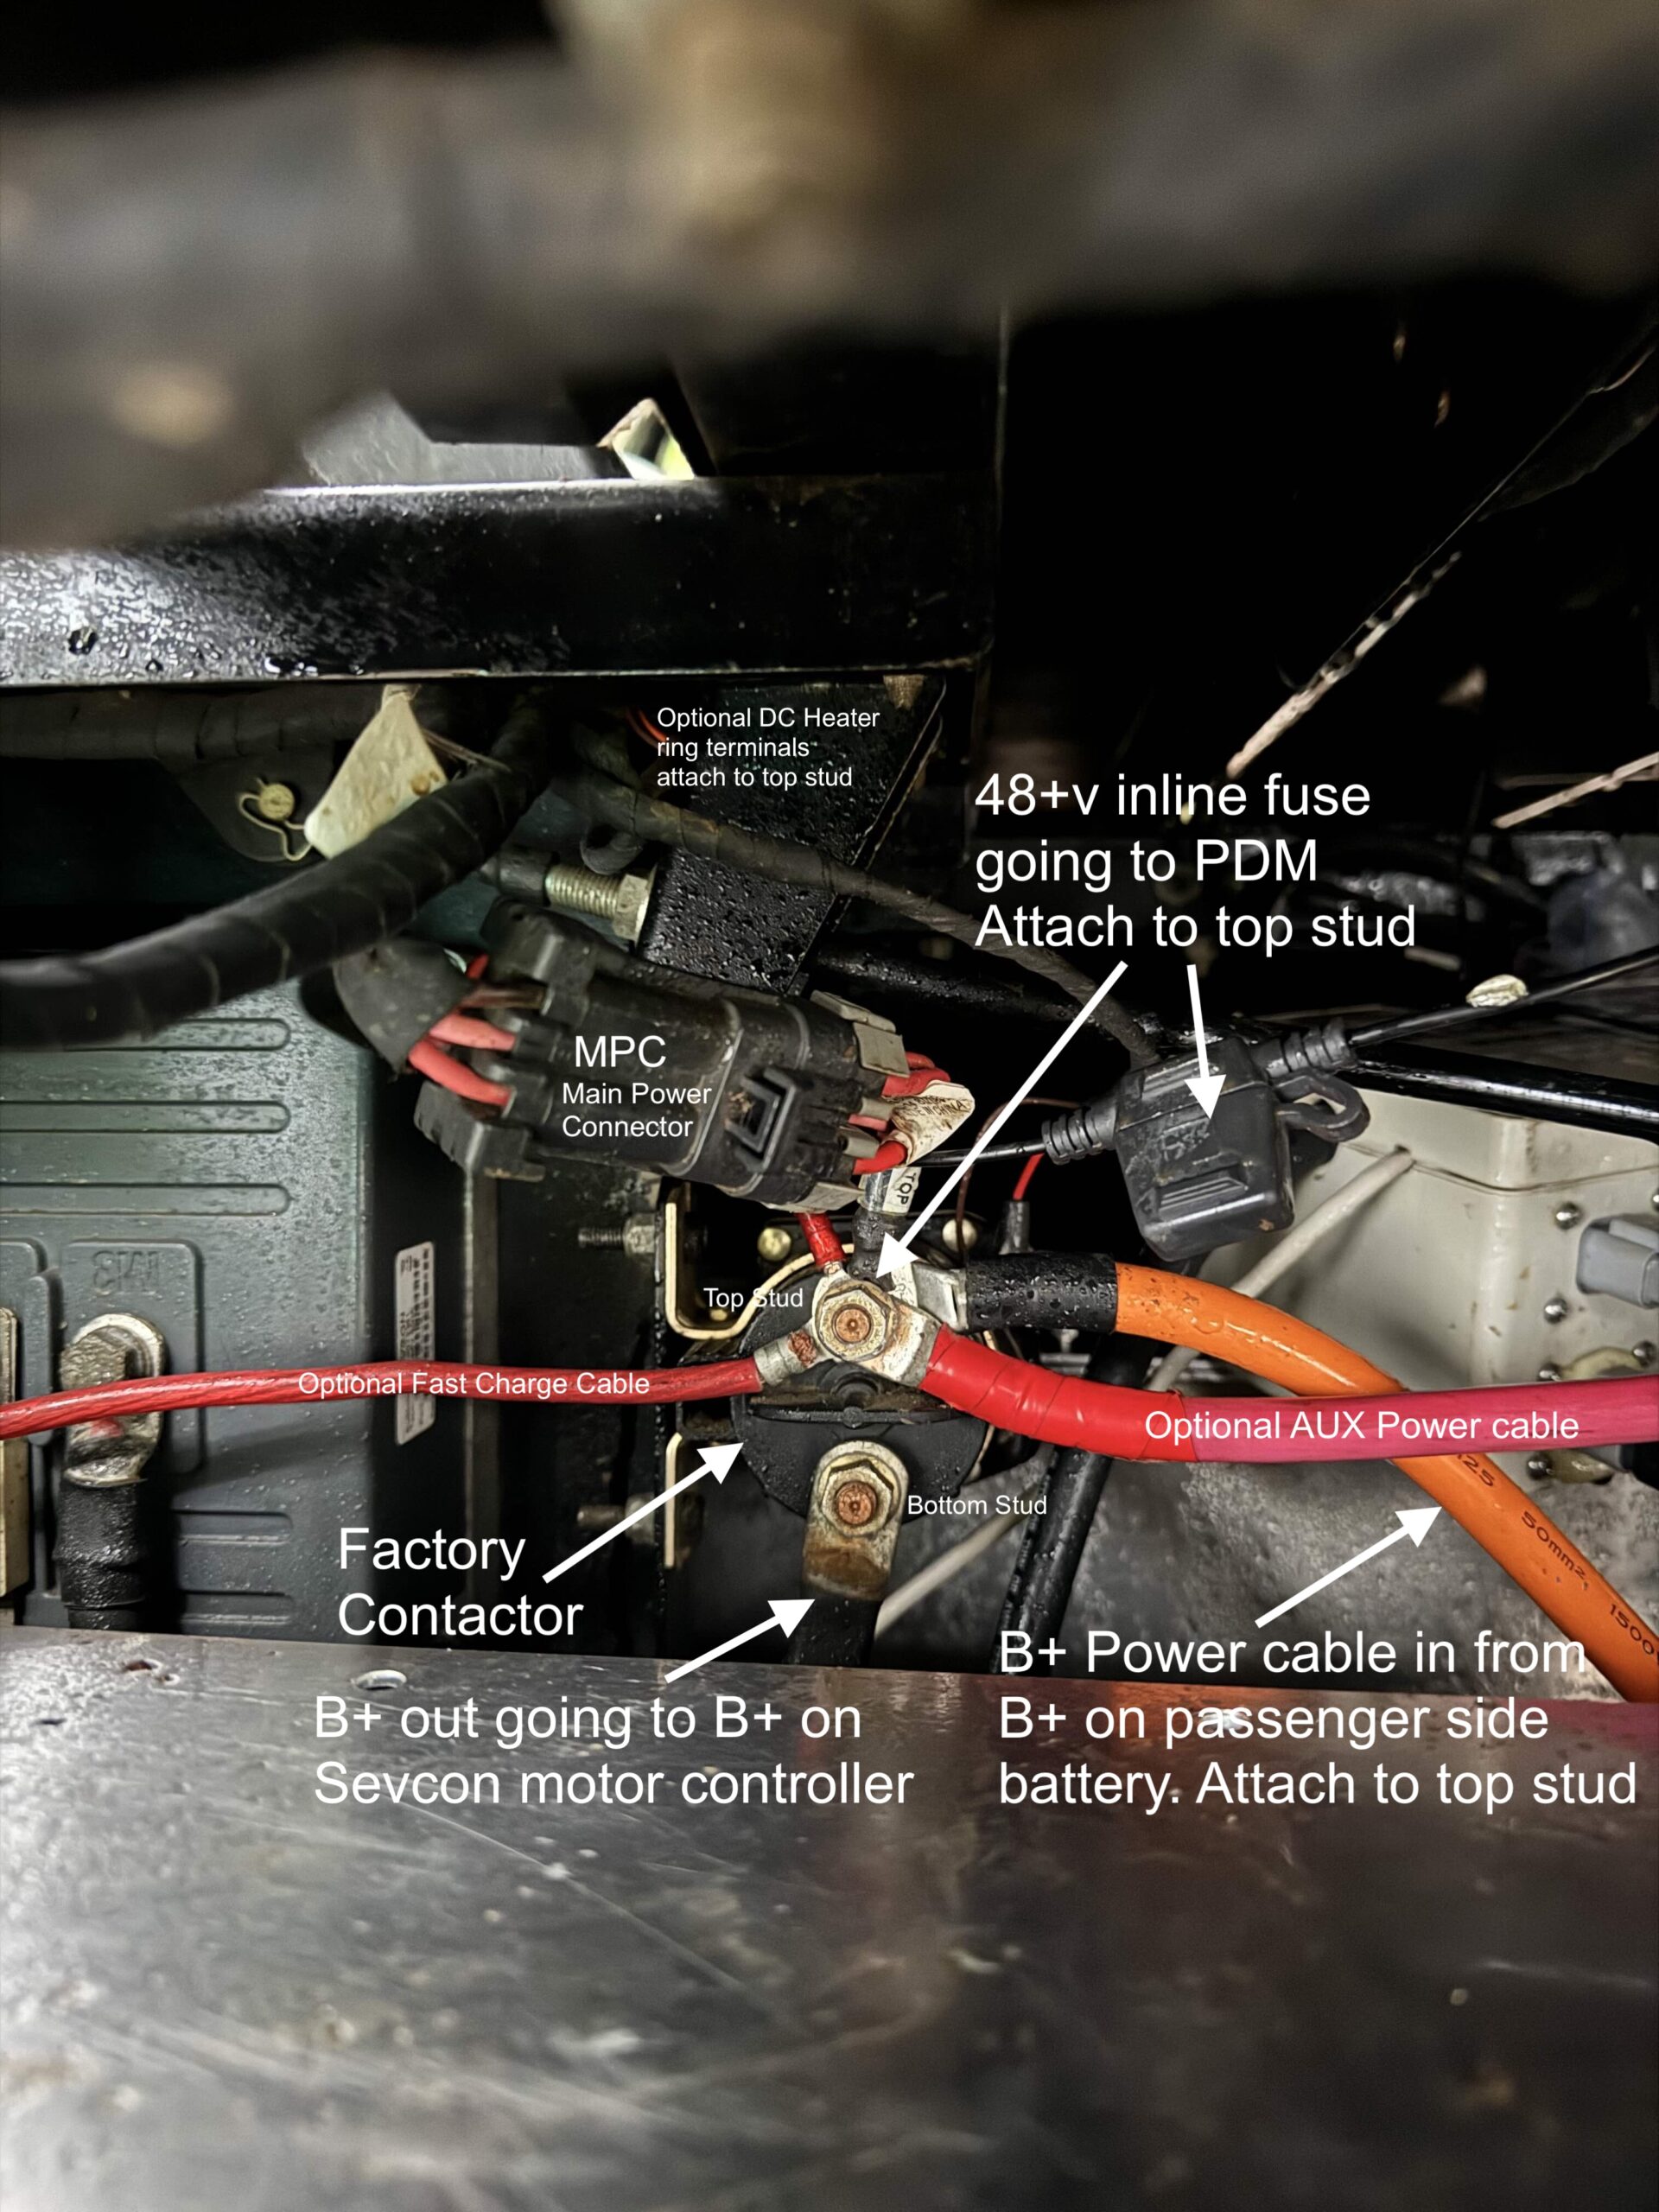
Connect one end of the Cross Connect Power Cable onto the negative terminal of the battery. Install Cell Loop Cables into the battery and the PDM
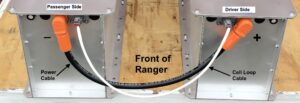
The following photos show how the cables are routed and connected.
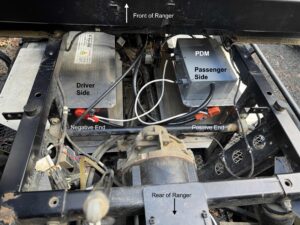
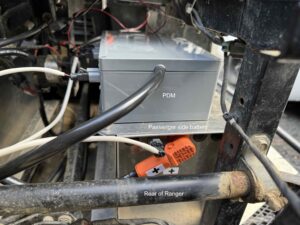
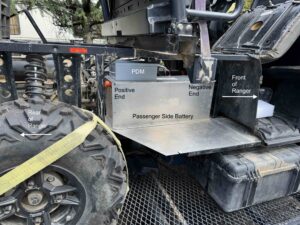
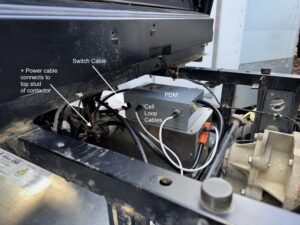

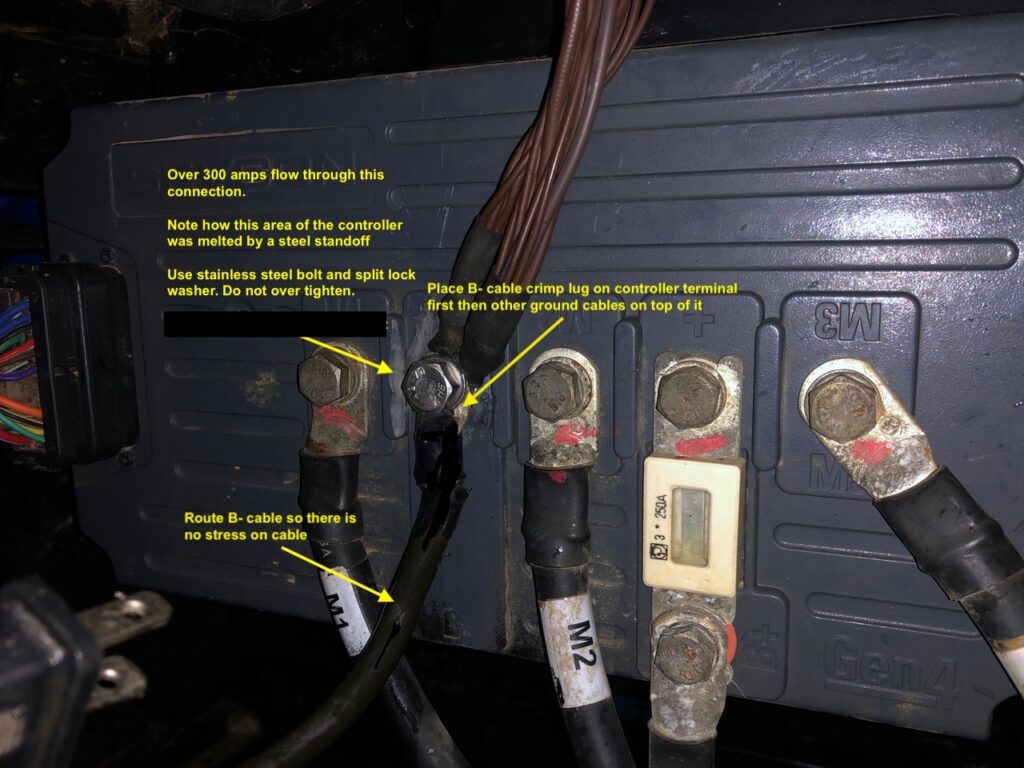
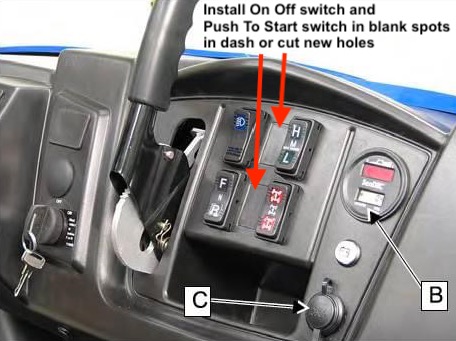
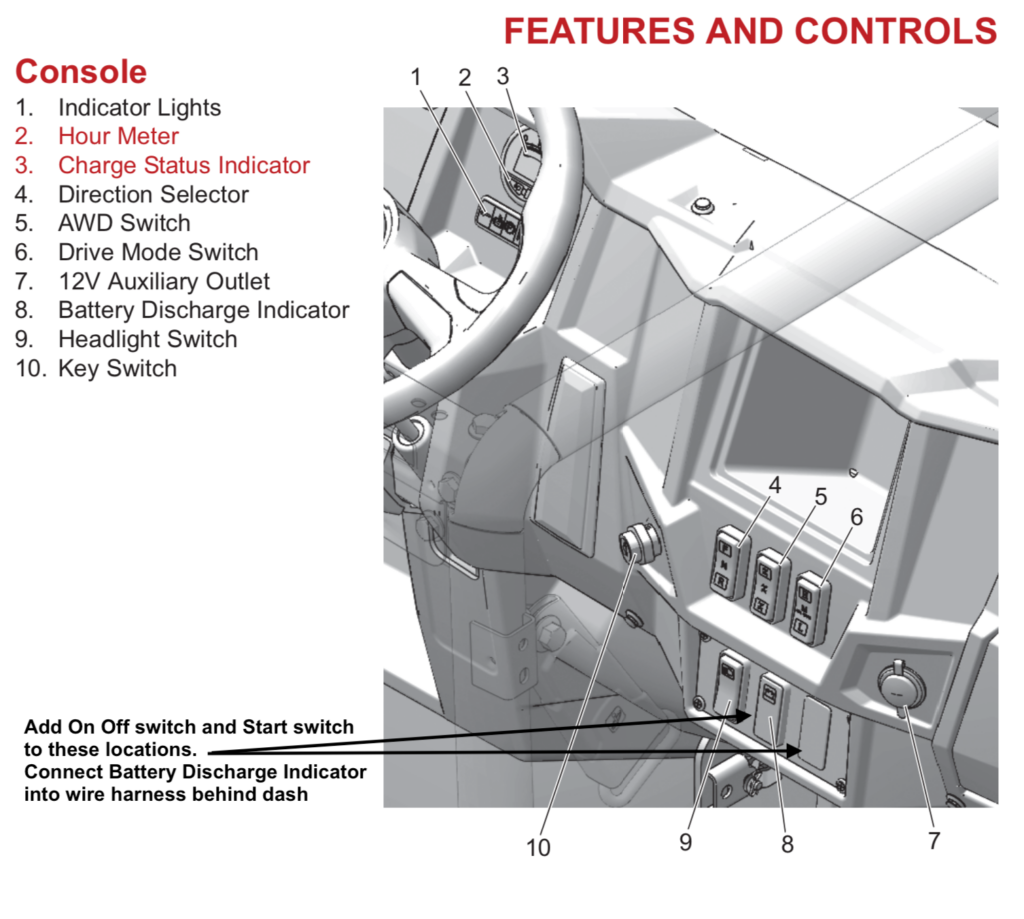
Remove the switch bezel on the dash and feed the switch cable through the hole, down fire wall, through drive shaft tunnel and up to PDM. Secure with cable ties.
There is an inline fuse on the end of the Switch Cable near the PDM. Attach the ring terminal on this inline fuse to the top post of the factory contactor.
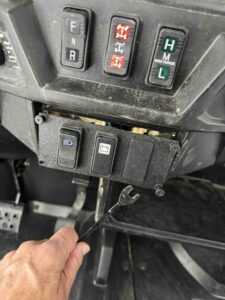
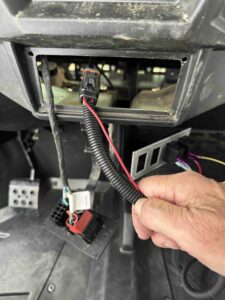
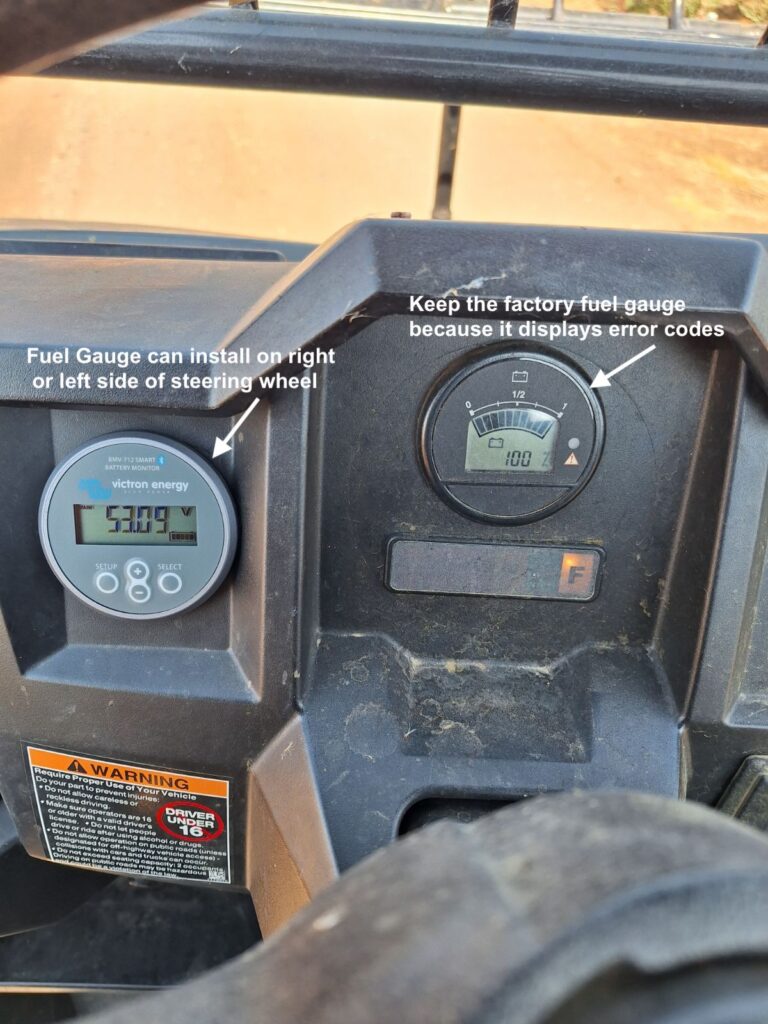
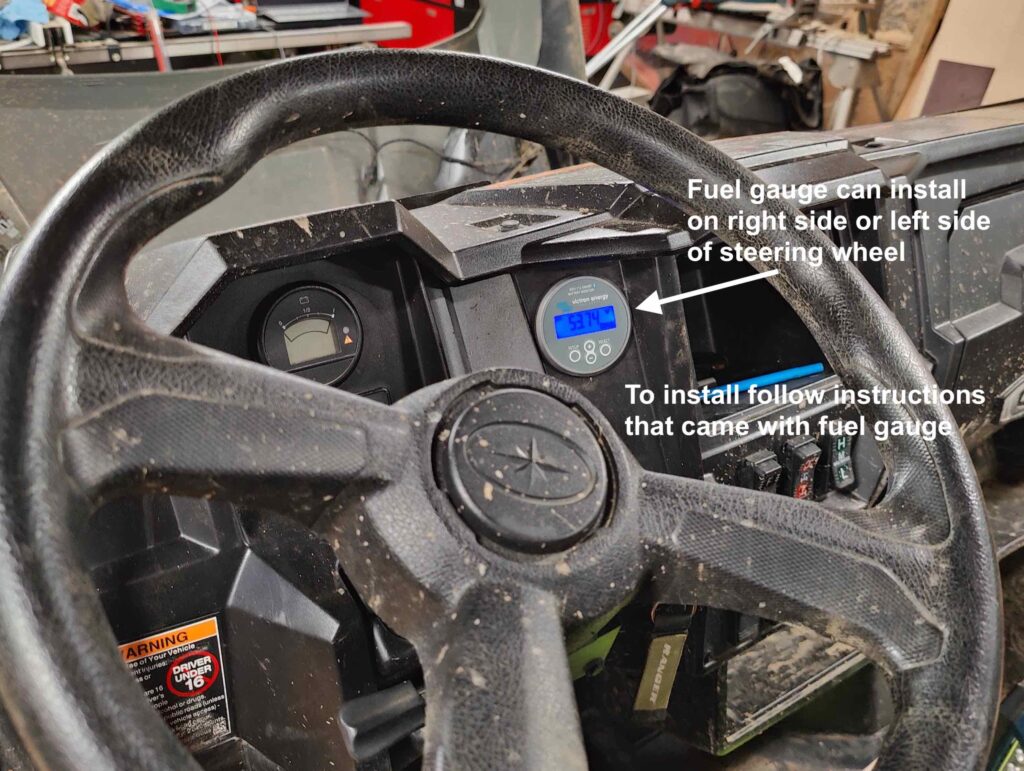
The factory Battery Meter can be difficult to remove. Pry off the retaining ring with a screwdriver.
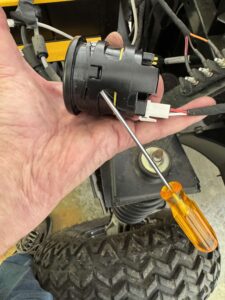
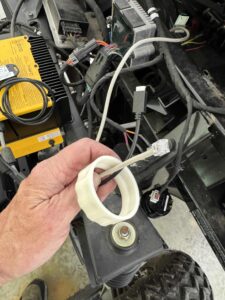
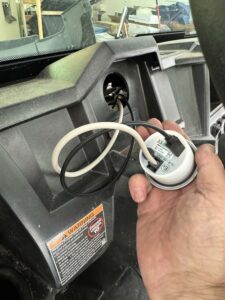
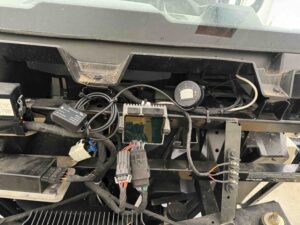
Run the phone cable for the Battery Monitor Fuel Gauge from the PDM, down through the drive shaft tunnel, up the fire wall and plug it into the rear of the gauge. Secure cable with cable ties.
Bluetooth Dongle
Plug the bluetooth dongle into the back of the Battery Monitor. Mount the dongle on a frame rail on the firewall under the hood. Mount it so the PIN label is readable and the LED is visible.
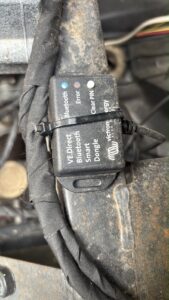
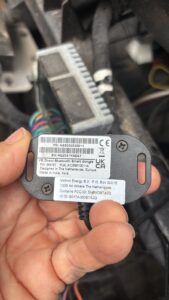
2015 to 2022 Dash
Install Driver Side Battery After Cables are Installed.
Place the driver side battery onto the floorboard with the negative terminal at the rear of the Ranger. Line up the battery with the mounting points and attach with 4 x 5/16" bolts.
Attach the cross over power cable to the positive terminal and the negative power cable to the negative terminal.
Attach the cell loop cables to each end of the battery.
Upgrade Factory Wiring
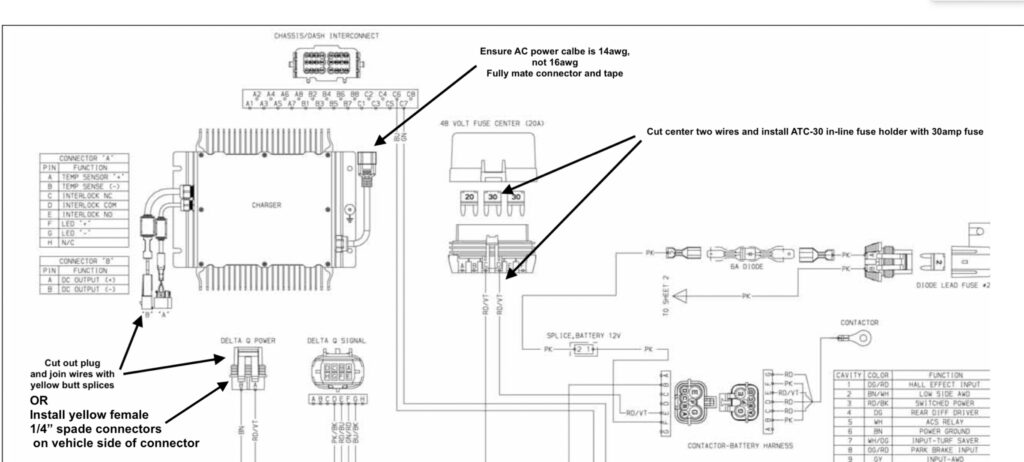
Install ATO Fuse Holder
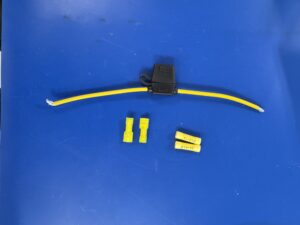
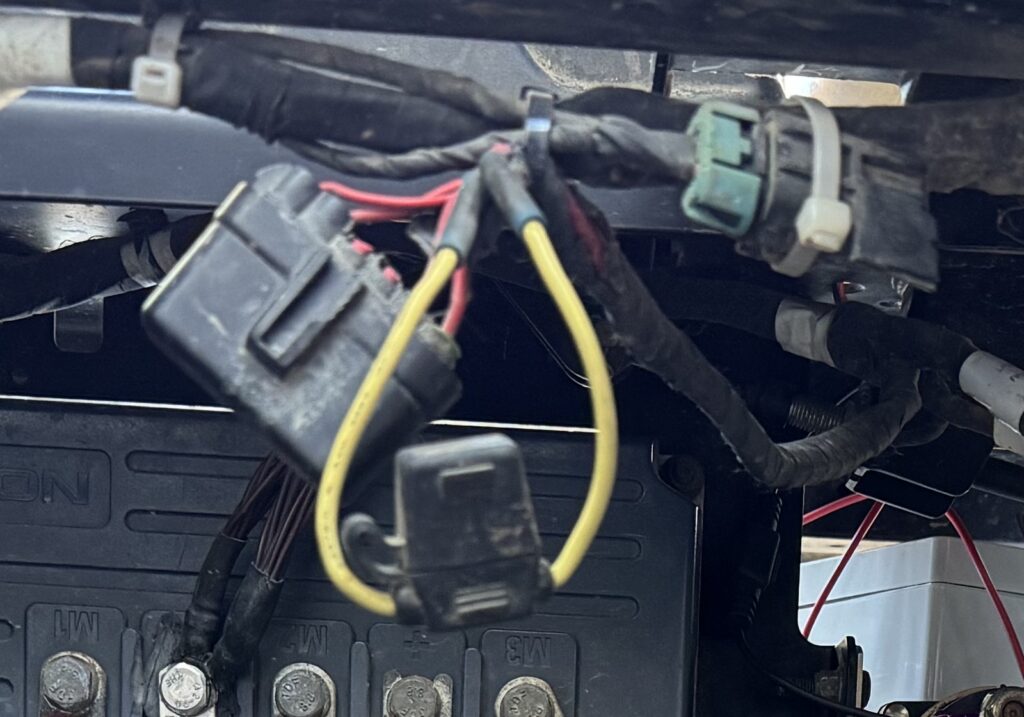
Upgrade the 48v fuse center by installing an ATO fuse holder to replace the center fuse. Cut the wires on the factory fuse holder as shown in the photo and use yellow butt splices to connect the ATO fuse holder. Potential fire hazard in Ranger EV factory wire harness
The center mini blade 30amp fuse in the 48v Fuse Center located under the drivers seat is too light. It can over heat, melt and burn the plastic. Cut off the 2 middle wires and install a 10awg in- line ATC-30 blade fuse holder and 30amp fuse or similar.
Charger AC Input Cord Must Be 14AWG Or Larger
The ac cord for the Delta Q charger should be 14awg. The ac plugs can wear out and someone can replace the 14awg with a 16awg computer ac cord. The 16awg cable end that plugs into the charger can get hot enough to melt plastic and burn. The same end can be partially inserted causing the plug to overheat and melt. Wrap electrical tape around the fully seated 14awg plug to keep it together.
Charger DC Output Power Connector Upgrade
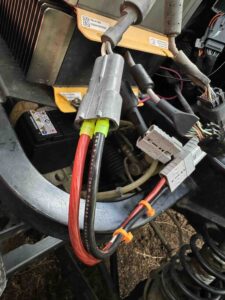
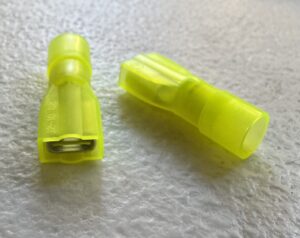
The DC Power output cable connector on the battery charger has 2 pins that can work loose and get hot enough to burn the connector. Cut out the plug on the Ranger side of the connector and install yellow female 1/4" spade connectors onto the 10awg wires. Plug these female spade connectors onto the male pins inside the charger side of the connector. Polarity is black wire to black wire, red wire to brown wire.
Test
Once the install is complete reconnect the MPC, main power connector.
Turn-on the Battery by pushing on the top of the On Off rocker switch. This is the “on” position. Then push in the Start switch. You should here a “clunk” as the contactor inside the PDM turns on. When you push in the Start switch, hold it down for a half second to allow the circuit to latch in the “on” position. Once the battery is on you can turn the ignition key to on and observe the Ranger operates normally.
User Manual
Normal Use.
For normal use:
1. Sit down, seat belt on
2. Foot on brake pedal
3. Direction switch in N neutral
4. Turn the battery “on” with rocker switch and push button switch.
5. Turn-on the ignition key (key on) to start the Ranger.
6. When finished driving turn ignition key off.
7. If driving frequently leave the battery on. If leaving the Ranger unused for days turn the battery off.
8. The fuel gauge (Battery Monitor) is always powered.
Charging
Charge the battery after it has drained a bit. There is no benefit charging every time you use it. Save wear on the charger.
Dead Battery
A. To start a battery that is between 46v and 34v:
1. Place the "On Off" rocker switch in the “on” position.
2. Push-in and hold-in the "Push to Start” switch.
3. While holding in the push to start button, plug-in the charger. Check the status LEDs on the side of the charger to ensure it is charging.
4. Hold-in the “Push to Start” switch until the battery voltage increases to 46v. You can watch the battery voltage increase on the Victron gauge.
5. You can release the “Push To Start” switch when the battery voltage rises above 46v. The battery will stay on and it will continue to charge normally.
6. It will take 15+ hours to get a full charge.
B. To charge a battery that is between 34v and 18v:
Follow the same procedure as above except know that the Delta Q QuiQ charger will only charge for a short time. Typically it will charge for 30 seconds then charging will stop and a red flashing LED will turn on. When this happens unplug the charger, wait 30 seconds for the LEDs to turn off then repeat this procedure. Each time the charger runs the battery voltage will increase a few volts. You will have to do this 3 or 4 times to raise the battery voltage to 34v where the charger will stay on. This procedure takes a few minutes or so.
C. To charge a battery with zero voltage or below 18v:
This voltage is too low for any of the circuits to work. You must bypass the contactor inside the PDM and trickle charge the battery.
1: Remove the lid from the PDM. Remove 6 screws.
2. Install a clamp or jumper onto the 2 studs on the contactor to short them together. A jumper cable clamp works nicely.
3. Plug in the charger. It should charge for 30 secs or more then turn off.
4. Repeat step 3 several times, observing the voltage should increase each time.
5. When the charger stays on let it charge until the voltage is above 46v.
6. Unplug charger and remove the clamp or jumper on the contactor terminal studs and restart the charger. It should charge normally.
7. It will take over 15 hours to get a full charge.
Note: This procedure requires algorithm #233 running on your QuiQ charger. We loaded this algorithm onto your charger when we reprogrammed your battery.
Emergency Power
This feature allows you to discharge the battery to zero state of charge. This can damage one or more cells but the damage is very little if you charge soon after doing this. Also, typically only one cell is damaged and you can replace it when it becomes a problem.
Emergency Power allows you to use the battery after it has turned off because it is empty. The empty battery voltage is 46v or less
1. Place the "On Off" rocker switch in the “on” position.
2. Push-in and hold-in the "Push to Start” switch.
The battery is forced on as long as you hold-in the “Push To Start” switch.
3. The Ranger will move as long as there is enough voltage to operate. Typically the Ranger stops moving around 34v. You can monitor the voltage with the Victron gauge while you are driving.
4. After using Emergency Power, charge the battery as soon as possible to minimize cell damage. Follow the procedure to start a dead battery.
Long Term Storage
For long term storage
- Turn the rocker switch off.
- Remove the fuse inside the 48v inline fuse holder going to the PDM. This will minimize power drain and the battery can sit for many months.
- If leaving the vehicle for several years: remove the battery box covers and unplug the middle jumper on each BMS Cell Board. Then replace covers.
